Thursday, 19 February 2015

ba2 - 500 Word evaluation


I would regard this project as more successful than the previous. I think the best decision I made was to start playing with ZBrush early. It allowed me to sculpt more quickly and try out more designs before committing to the final sculpt. ZBrush is a lot of fun. I certainly find it easier to express my ideas in than Maya or Photoshop. 
Most, if not all of my iteration was done in ZBrush. The pro is that it helped with understanding the software. The con is that maybe the iterations are less varied than they could be.

I’m very happy with the final gargoyle. Judging by the reaction of my friends I’d say people generally recoil to some degree when they first see the sculpt, which was my goal. One aspect I’m not as happy with is the stand from which the gargoyle is hanging. The stand arose from the fact that gravity pulls water towards the earth so it seemed counterproductive to have some kind of system which pumps the water upwards. The design does look a bit forced though. Hopefully it’s original at least. If I’d had more time I would’ve spent it refining the stand.

I did notice the export to 3D printer option in the menus. It isn’t directly related to games design but I’d love to model figurines as a job. I don’t suppose the polycount or topology would really be an issue, not that I found it much of an issue in this project either. 

I was dreading starting the essay as I always do when the title is vague. However, once I mind mapped the games industry and figured out what I wanted to write about It went quite swimmingly. I was able to gather a huge library of references form my collection of YouTube videos and bookmarked articles on games design. I’ve also been reading through ‘Reality is Broken’ by Jane Mcgonigal and ‘Understanding Videogames: The essential Introduction’.  I’ve recently finished reading Anna Anthropy’s ‘Rise of the Videogame Zinesters’ too so I had lots of references in mind when writing the essay. I think that helped.

I emailed Robin Silcock and Lester Francois, director of ‘Game Loading: Rise of the Indies’, to be released March 13th. Both are great contacts to have and I’m much more confident in messaging game developers online now. I spoke to some game developers in real life too at the Norwich Indie Game Dev meetup. It was very cool to be in a room with so many indie game devs at once and to get tips on my own game development.

Overall, it has been a successful project. I’m much more interested in 3D modelling now as a potential career choice and I think I’ve improved a lot. I’m definitely going to continue using ZBrush in my spare time.

Wednesday, 18 February 2015

Project 02 - My YouTube 3D Collection

HERE is a link to my personal playlist of videos I've watched to help me learn specific things in Zbrush.
They've been extremely helpful in learning the software. 

Project 02 - My YouTube Games Design Collection

 HERE is a link to my personal playlist of YouTube videos on Game Design. I've been accumulating this list for a couple of years now and it's only the best of the hundreds of Game Design talks (etc...) I've watched.They've been very useful for referencing quotes in my essay on Games Design.


Project 02 - Newse

This is the new stand from which the gargoyle hangs. I wanted to include the stand in the turntable but it got in the way of the gargoyle so I created this new one.


You can see where moss has accumulated around where the water empties into the tube for the gargoyle.

The beams holding the stand up are thin enough in this build that they don't obstruct the view of the gargoyle in the turntable.

Project 02 - Rusty Moss


In this updated polypaint I've added a mossy residue to crevices and areas that would have been water damaged. I've also made the cracked skin into rust.

The sculpt is more interesting now it's more colorful again. The green and orange contrast nicely against each other.


A lot of moss has formed around the opening of the vena cava because it's where all the water pours from. You can also see the mold has settled in the ridges in the lungs.

Project 02 - Polypaint 2


Here is an iron version of the polypaint sculpt. Using these images as reference I added an orange tinge to the grey. I also lightened the colors around the ridges to make it look a little worn.


You can see that I've added welding around where the tube connects to the eye socket too.

I think this sculpt looks a little more believable than the other one but it's also less interesting. I think it belongs to a different time.

The aluminum sculpt looks very modern and I like that but maybe it doesn't fit the brief as well.

I think I might work into the iron one some more so make it look more interesting and I'll see where that takes me.

Saturday, 14 February 2015

Project 02 - Polypaint

A tiny bit more texture on the chin to make him look more realistic.

This kind of angle is how most people would see the gargoyle. The expression looks really strong from below and it allows people to see the organs clearly too. They don't obstruct the view to the face.

Also, the less interesting back of the head is facing the wall and the interesting features are facing the viewers/ players.

I chose to go for an aluminum texture because the thin parts need to be able to support the heavier parts and aluminum is both strong and light. I imagine the lungs, head and heart to be mostly hollow so that they're not too heavy and cheaper to produce. If you bashed them, the sound would echo inside.

I wanted the colours to represent that of the human but to also feel like they could be made out of aluminum.

Metal sculptures are rarely painted so each organ would be cast from dyed aluminum and then welded together.

The model would be protected from rain above by the wall and from vandalism by it's height.

The main source of weathering would be from the water going through the gargoyle.

You can see in this closeup how the water has seined and eroded parts of the face over time.


I like the way it trickles down the creases in the face like real tears would.

The idea is that the water would also flow down inside the trachea, through the lungs and into the heart via the pulmonary artery.

The heart would then fill up with water and overflow from the hole in the vena cava.

The water has stained the metal on the heart too.

The Zbrush material I chose was 'MatCap White Cavity'. I like the way it exaggerates the creases, making the facial expression look even more pronounced. Also, it looks very metallic and nice to touch.

Thursday, 12 February 2015

Project 02 - Textures and Topology

Just another quick variation on the idea. I liked the idea of the brain showing through the skull.

I made a skull subtool and a brain subtool in order to mock up the idea.

Looking at the sculpt now though I think it looks too zombie-like. I'm not sure the viewer will be able to relate to the character.

So I think I'll stick with the other version.


I've also been using the various alpha settings to create texture.


The skin now has very feint noise so that it doesn't look so smooth. I have however smoothed the noise inside the mouth and on the ears for example.

I've applied a kind of rocky/ cracking skin texture to the cheek and partially on the ears because I feel like the viewer will be able to relate to how uncomfortable it would be. I've also tried to replicate the folds of the lower eyelid with the rake brush. I used the rake brush more faintly on the lips too to recreate the texture.

The sculpt has 3 levels of subdivision.
I used a mixture of decimation master and Zremesher to create the topology. I drew ZRemesherGuides using what I'd learned through reading and this image as reference.
I also drew ZRemesherGuides along creases.

I still think there are too many polygons on flat, less animated areas so I have that to work on still.
Then again, I do need quite a few polygons if I'm going to have that cracking texture.

I've also applied the same topology techniques to the other subtools in the gargoyle.

Monday, 9 February 2015

Project 02 - PainFacade

My current design doesn't really take into account how the water will enter the gargoyle and exit it.

The vague plan was to have the water enter into the spine from the wall but clearly It can't move upwards against gravity without some kind of mechanism pushing it.

Oh, I made the neck look all stringy and gory so it feels more realistic.


Here are my proposed variations on the design:

This first one's pretty much the same as the original but I've rotated it all so that the water could flow down the spine and out of the heart/lungs.

I haven't modeled the actual tube yet but these are just mockups.

I like how the trachea wraps around the spine in this design.

I do think the gargoyle may have structural issues with all of that weight hanging perpendicular to the wall. It might reduce it's believability and therefor its impact on the player.

My second design plays with the idea of the head hanging below a part of the roof hanging over the edge of the building.

I removed the spine in this piece because it wasn't as necessary for the structure in this design and it was increasing the polycount.

The water could travel through the tubes from which the head is hanging and out of the eyes and lungs?

The tubes do look a bit superficial but I do like how the man looks like a test subject.


This third design only has one tube where the water streams into the mans eye hole.

I edited the 'building' a bit more so that the gargoyle makes more sense it terms of how it's hanging.

Although the tube is thinner than the spine, I know this gargoyle has better structure than the first design because physics dictates that     weight = mass * horizontal distance from origin (I think. Physics was a few years ago)

Could the water come out of the other eye as if he's crying?

Or the mouth as if he's bleeding?

Or maybe it should come out of the heart and lungs?

Or maybe all of the above.

I like this design though. I think I'll play a little more with the tubes idea but overall I'm pretty happy.

I'm thinking lots of tiny intertwined tubes but I do have to consider the polycount now though as I'm over 600,000.


Until then, here is a closeup of the gory neck hole


Saturday, 7 February 2015

Project 02 - PainFaces


I modeled these five facial expression variations, I uploaded them to facebook, and I got some feedback.

The second and fifth faces got the most love and I think I agree that they're the most pain expressing expressions.

The asymmetrical features on the 2nd one really help bring the piece to life too.

"I feel so sorry for him..." is a great response. Strong emotional reactions guys. That's what it's all about.

I applied the necessary changes, trying to combine the two favorites and adding extra detail and realism.

This is the result

I also included the cuts around the mouth resulting from my operation.

I tried to make it look as realistic as possible because it'll allow people to relate to it better I think.

I might add the rest of teeth at some point but I think just the 6 front ones are enough detail. From certain angles though it might look a little weird.


Very happy with the gargoyle so far. Next up is:
- Topology?
- Textures and Polypaint?
- Reposing the figure?

Friday, 6 February 2015

Project 02 - PainFace


I was looking back at my post about Eraserhead and I noted that the pain in the baby's face is certainly one of the more distressing things about the scene.

I've been trying to make this new head look as uncomfortable as possible.

It's still unfinished however.
- Needs ears
- Needs to be more asymmetrical
- Needs the inside of a mouth
- Needs more wrinkles
- Needs a bit more defining

but I like it so far. It looks like it's in pain from every angle.

I do think I may have stayed somewhat form 'uncanny' though. Now I think I'm in grotesque? distressing? Scary?


Currently: 620,772 total points


It looks like something from hell. That's good.

Like I said, stronger emotion = better art (imo).


Project 02 - HeartFace


This thing took forever to sculpt. It's made from four separate subtools all meshed together.


The thing which took the longest was getting it to sit realistically between the lungs.

The lungs have undergone quite a bit of editing to make this possible. I think they look more realistic now though. They're certainly more asymmetrical.

I'm in debate whether to attach the heart to the trachea with wrapping veins and the such of to have it joined directly into the lungs via the pulmonary artery.


Lungs, heart and trachea from behind


I moved the lungs back a bit so that they hang more naturally from the spine.

I'm not sure I like the head anymore. It looks a little bit too cartoony relative to the rest of the gargoyle.

I'll work on a new head next.


Project 02 - LungFace


These are the lungs modeled for the Spookyface sculpt. I increased the noise variable to create the texture then smoothed it down on the inner sides for the slimy look.


I probably should have used Zspheres for the trachea like I did for the spine but I got there eventually with much dynameshing.

I suppose one of the good things about modeling gargoyles is that it doesn't really have to make sense physically. If the trachea was really made of trachea it would just fall off the spine but because gargoyles are made of stone I can get away with it.


All components together. I think the head is a little big but I can fix that no problem. 

I'm happy with the gargoyle so far. I think these lungs are the most realistic looking thing I've ever modeled too.

I can feel myself improving in Zbrush quite rapidly.

Intrinsic rewards.


Thursday, 5 February 2015

Project 02 - SpookyFace

I've been trying to use a lot of the techniques I spoke about in previous posts about making creepy things.

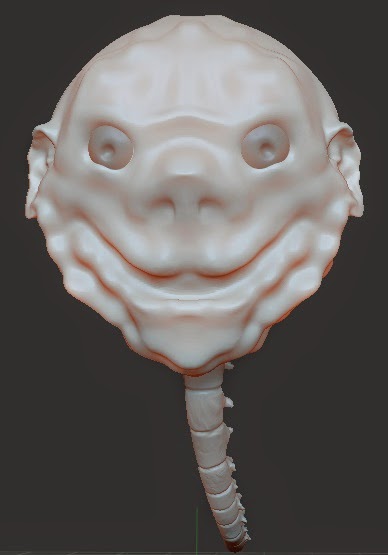
One of the things I like about this piece is that it's very difficult to tell the emotion of the gargoyle. From some angles it looks like it's smiling, others angry and some angles it just looks goofy.

I was inspired by the baby from Eraserhead so I've modeled an  asymmetrical spine from which to hang the lungs and other organs from (which I haven't modeled yet).

The end of the spine will be where the gargoyle is attached to the wall and the head is pulling away from it with the organs hanging down.

I also wanted the head to be ambiguous in what creature it's supposed to be.
Is it human? alien? is it an animal or a demon?
It certainly defies any laws of physics or physical health for that matter. That's why I think it'll be really creepy when I'm done.


I've taken extra care to model the spine realistically using stock photos as reference.

But also scarily by exaggerating the pointy parts and making it all twisted and grizzly.

The idea is that the water will run (pumped?) through the spine and come out of the gargoyles mouth with bits of water leaking out around the organs to look like they're bleeding.


Anyways, just thought I'd quickly update the blog before I go to sleep. I'll work on this gargoyle some more tomorrow.

Project 02 - Eraserhead Spoilers

I knew this film would be relevant to the project because of its uncanny nature.
The film subverts the viewers expectations brilliantly by setting up a scene done in many movies and then surprising the viewer when it goes differently. Surprises are funny, and especially weird when juxtaposed with the surrealist-horror theme of the rest of the film.


I won't explore the cinematography or metaphors too much because it's not relevant to the project

One of the creepy things that stood out to me is how obviously 1-dimensional the characters all are; most of them keep the same expression or two for the whole time they're on camera. This is clearly intentional and it feels creepy because you can never be sure whether their expression represents what they are feeling or whether it's a metaphorical mask, hiding something else.

This scene features one of the only characters with much of a personality.

Her cheeks are all swollen and scarred (reminds me of my operation) as she smiles, enjoying the experience of playing with and crushing the fetuses on the ground.

The scarring is interesting because it makes the swelling look painful, causing the viewer to revel back in sympathy/empathy.
 
This is what may face looked like a few days after having both of my jaws displaced. The operation was called a (Bi-maxillary Ostectomy).

It looks uncomfortable because it was. My jaws were clamped together for 2 weeks but it was a surprisingly enjoyable experience nevertheless.

I definitely think I can replicate the soreness this picture and the one above evokes in a sculpture though. I think it'll improve the creepy factor.


The scene where Henry cuts open the baby's bandages was my favorite and the most powerful scene for sure. The shock when you realize that the only thing keeping the baby still alive has been torn apart is pretty strong and watching it shake in pain is quite distressing.

That's the emotion I'm looking for with my gargoyle.
My sweeping statement for the day is:

"The stronger the emotional reaction, the better the artwork."

Wednesday, 4 February 2015

Project 02 - Apex 2015

I did no work whatsoever on Sunday because I was watching Super Smash Brothers Melee (SSBM) at Apex 2015 on twitch. Since Ryan and Jake Neal did their lecture I've been able to consider SSBM as a viable source of income.
I was surprised to learn that the winnings for the tournament are considerably smaller than a lot of other competitive games such as Starcraft 2 and DotA 2.
I think most competitive gamers and speedrunners make the majority of their income through twitch streaming rather than tournaments. For a lot of people it's a job on the side too, rather than the main source of income.

Regarding our essay on roles within the industry, I don't think I'll work towards competitive gaming/ speed running as a main goal; rather a secondary hobby/job besides:
Games Designer/ Management?
Game Theorist?
Fine Artist (making interactive works of art)?
Game Journalism?

Tuesday, 3 February 2015

Project 02 - Fish-ec-lips(e)


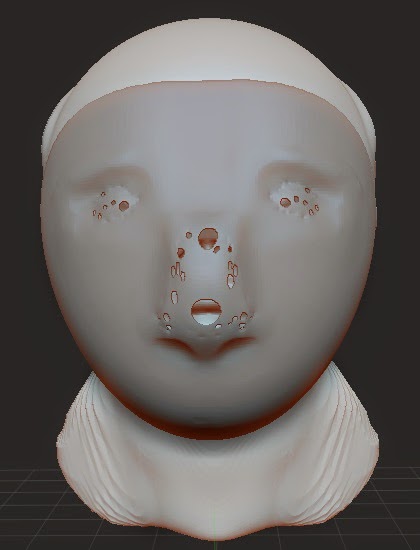
This masked man was my first attempt at creating something uncanny/creepy. I wanted to create something really ambiguous (and therefor creepy) by completely covering its facial features. The mask model was so thin that when I dynameshed it, holes formed. I decided to keep them in because of how they hint at the face behind but still keep it very hidden. They also look a bit like rust, implying that the mask has been worn for a very long time, which is creepy.
I also kept the tears in the mesh on the shoulders because I also felt that they added to the creepyness. 
 

This is what he looks like without the mask on. Very robotic and lifeless is kind of what I wanted. Just knowing this face is behind the mask makes it creepy. I like the cheeks on this sculpt too because of how vague the density of them is and in fact this whole face. It's all very ambiguous.

I really like drawing teeth and mouths in general. I think it probably has something to do with the huge amount of orthodontic treatment I've had. I know how creepy the emphasis on mouths can be if done well so I attempted that in this maquette.
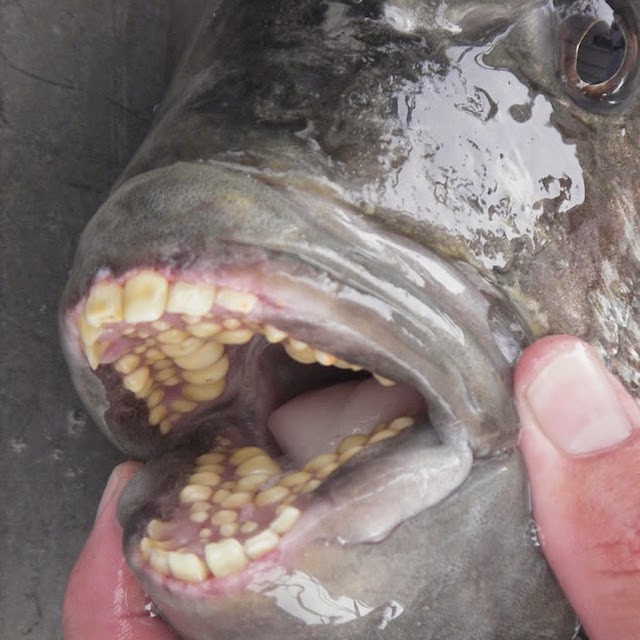
I think what makes this sculpt creepy is how human the mouth looks relative to the rest of the model. I always found it really weird that fish have human-like teeth.

This image makes my skin crawl


I think it'd be even creepier with more teeth like the fish. Also, I was thinking about how it might mount to a building and I exaggerated the scale hugely. Imagine that cuboid as a building. How scary would that massive toothy head be?
 That or a lollypop that bites back.